This DIY distressed farmhouse nightstand project will brighten up any room and add something fun to your decor!
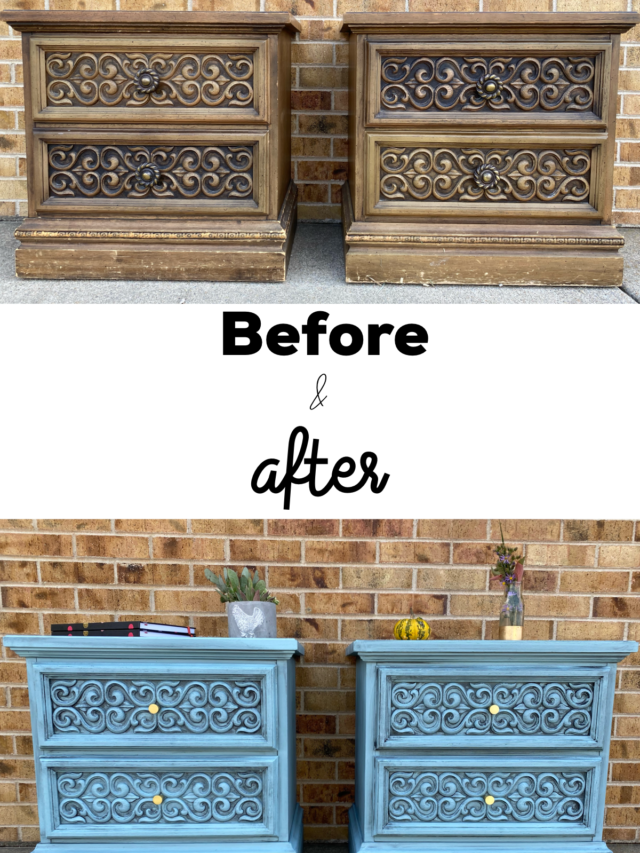
I did a really fun DIY paint/stain project with these vintage nightstands, (bedside tables? Farmhouse nightstand? What’s the difference? I don’t know) to get a distressed farmhouse look. I love how they turned out, and it took just a few hours total of work.
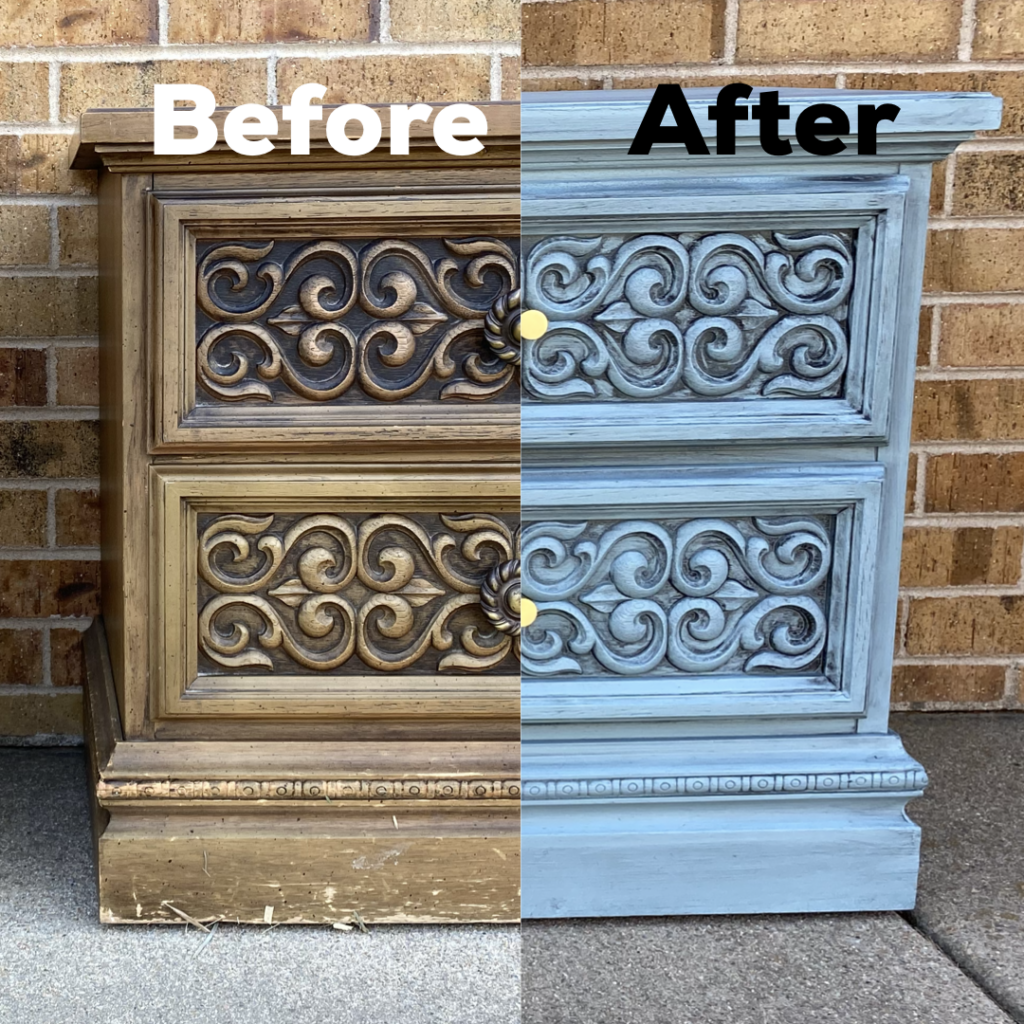
Where to find pieces:
I picked these nightstands up off OfferUp. If you haven’t tried it yet, it’s a great app – kind of like Craigslist, but it rates the users so you can determine, based on their other interactions, if you want to do business with someone. I also have found some great deals on Craiglist, Facebook Marketplace, and Nextdoor – so they’re great to check out, too. Nextdoor is ideal for furniture because there usually isn’t a lot of driving involved.
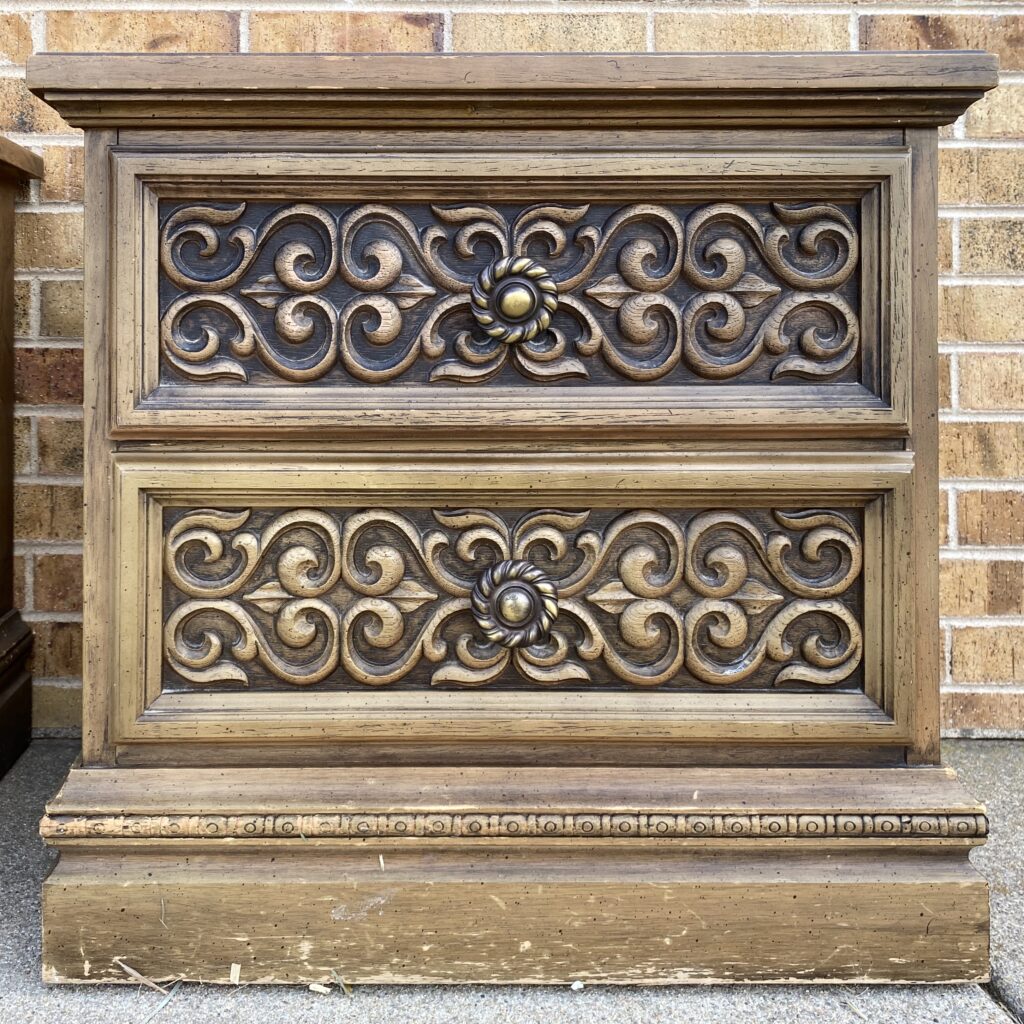
The woman who posted these pieces asked for $20. I offered $15 and she agreed. $7.50 per nightstand. Score.
How to pick:
What really appealed to me about these pieces was the scrollwork on the front. I really loved the visual interest they could add to a room. Especially with smaller accent pieces, there’s a lot of wiggle room to add color and pattern to a change a look without the commitment you have to make with bigger and more expensive pieces.
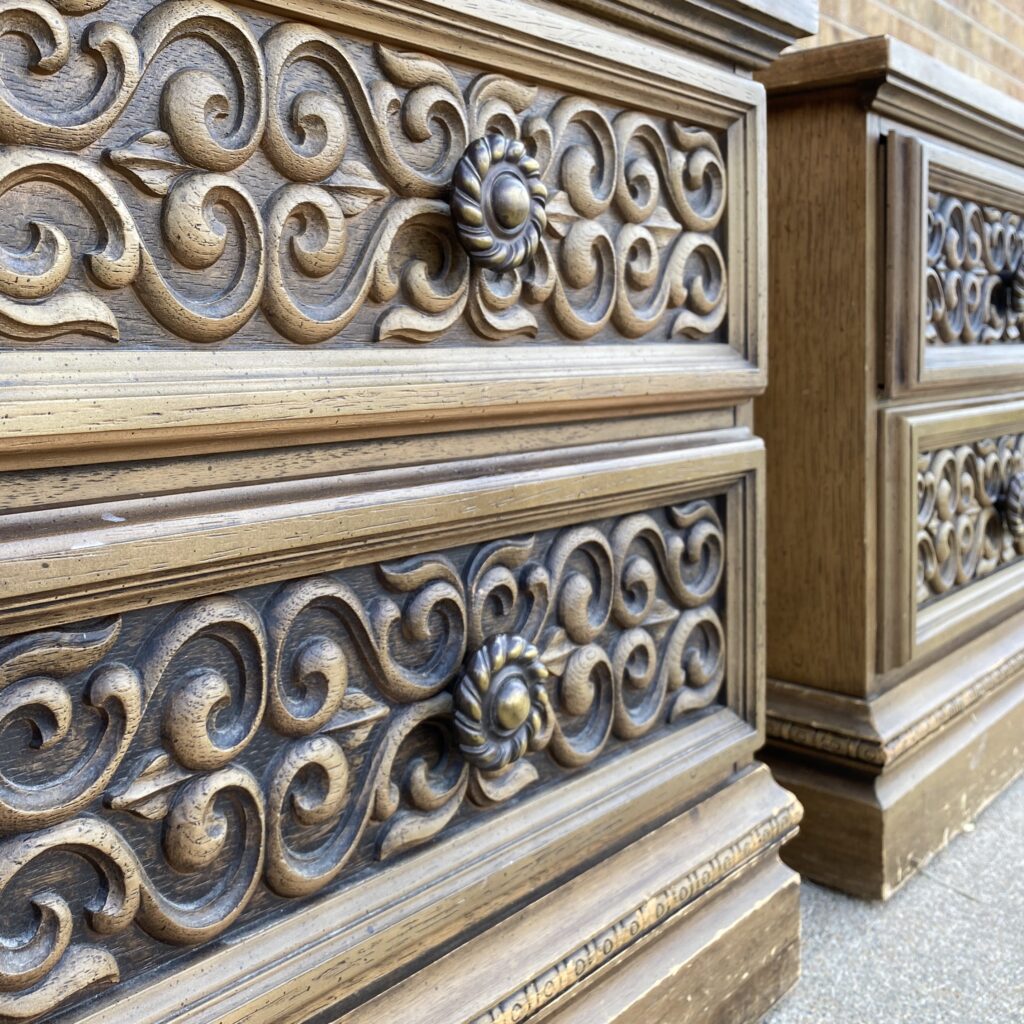
I also liked that although they have a lot of depth, and they aren’t wedded to a specific decor. I’ll be using them as farmhouse pieces, but they could also work equally well in coastal or even modern rooms. They also provide great storage. I have two kids. I always need more storage.
What you need:
Can of chalk paint – I used the Killz “blue juniper” color which comes out to a nice, rich, almost duck egg blue. It’s brighter on a piece than the swath on the can makes it look. Luckily, I knocked it down with glaze. A whole can cost about $20 (I used less than half the can.)
Paint brush – Luckily, chalk paint is very forgiving, but I still prefer to go with the nicer paint brushes. It’s ok if you have a few brush strokes, it will look really pretty when you use . . .
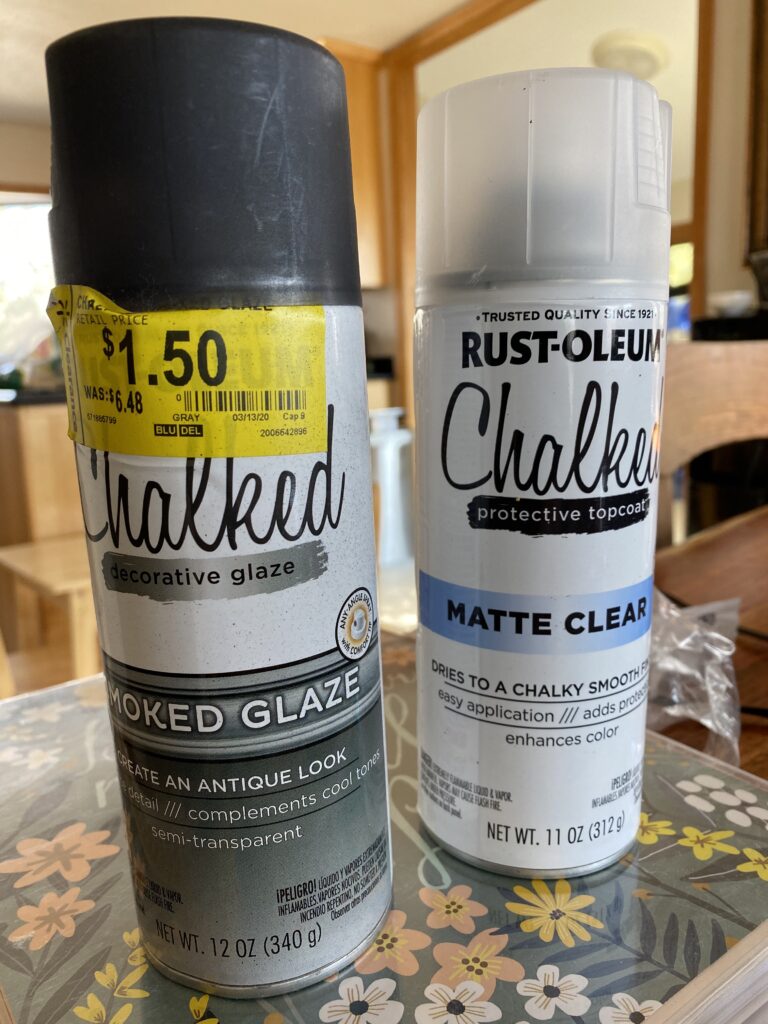
Glaze for chalk paint spray can – I used the Rust-oleum “Chalked” smoked glaze. Luckily, I managed to buy this on clearance for $1.50 (score) but it’s normally in the $6-7 range. It is designed to complement cool tones. I really wanted to use a glaze to pull out the great detailing of these pieces.
Non-pilling cloth or rag – To wipe the surfaces of the pieces to achieve the desired “distressed” look. I just use old cheese cloths and trash them after.
Spray paint topcoat for chalk paint – Since I was already using a spray glaze I thought I would go ahead and try the spray topcoat. It’s great. I used the Rust-oleum “Chalked” topcoat.
Gloves – You don’t want to have paint stuck under your nails.
Denatured alcohol or another cleaner – You want your pieces perfectly clean before you start painting.
New knobs – I found these modern brass knobs on Amazon. The new hardware helps to give a facelift and really set off the cool carved look of these pieces.
Optional: Sandpaper – I decided to sand these pieces, even though I’m not generally a big fan of sanding. These vintage pieces have a laminate top that is really common for furniture from the 60s, 70s, and 80s (I have no idea how old they are – but that 30-year-range is a good guess.) I wanted to make sure that the paint adhered well.
What to do:
Sand and prep
Many pieces don’t require sanding if you’re using chalk paint (chalk paint isn’t for everyone, but I love it, try it with some small and cheap pieces first to see if you dig it.) However, I decided to sand these. The tops of both tables are laminate and the carved drawer fronts seem to be some kind of resin. I sanded down all the surfaces to be painted but didn’t do a second sanding with a fine grain paper. I like a little bit of wood grain, brush strokes, and a slightly rough look.
Next and most importantly, I really cleaned both pieces well not only used a cleaner but also a disposable duster. This is to ensure there wasn’t anything left over from sanding. A really thorough cleaning is necessary to ensure ideal paint adhesion.
I then taped up all the places on the edges of the drawers to ensure would have a straight line.
Paint
This is the fun part. I put the kiddos to bed. Then I opened my paint can, poured some in a cup, turned on my favorite podcast, and went to town. There is something so gratifying about the actual painting process. I painted with the grain of wood, (in the parts that were wood) and pulled long, even strokes across the laminate top. In the carved portions I used a dab motion to ensure total coverage without pooling.
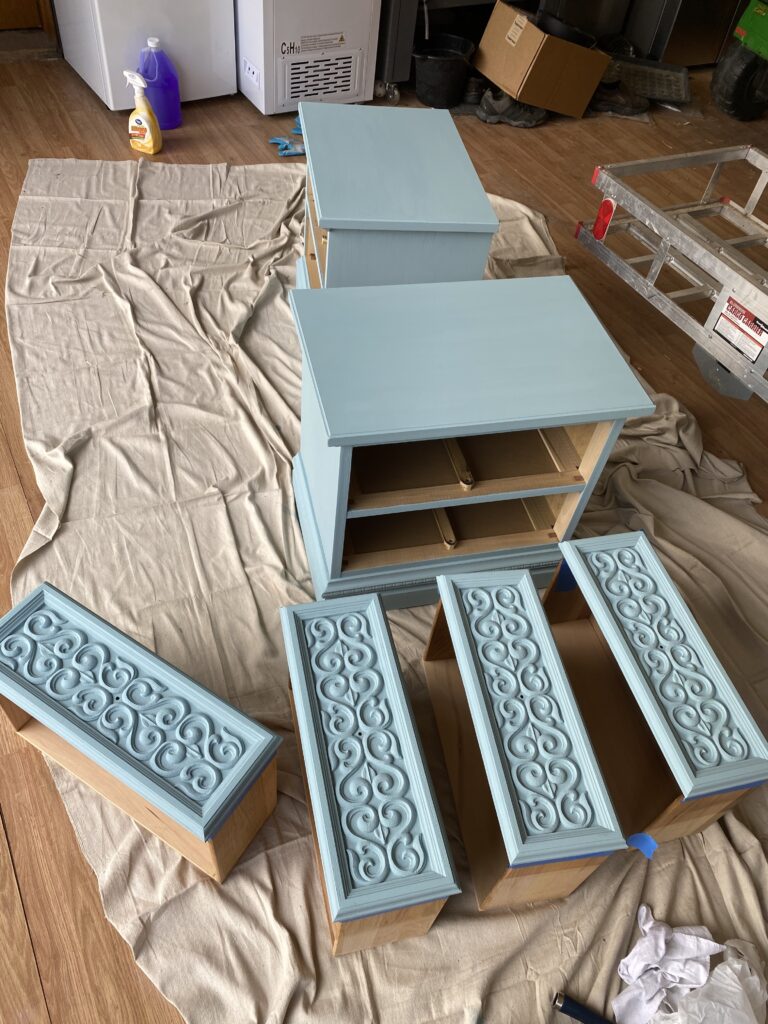
My husband came out to the garage several times to note how BLUE they were. Yes, that’s the point. It’s fun to play with bold colors when they’re small and inexpensive pieces.
I allowed them to dry overnight.
Glaze
For these tables, especially to bring out the beautiful carved look, I used a smoked glaze designed specifically for use with cool-toned chalk paint. I took all the pieces outside and only sprayed a small section at a time, then wipe it down with the cheesecloth until I got the look I wanted.
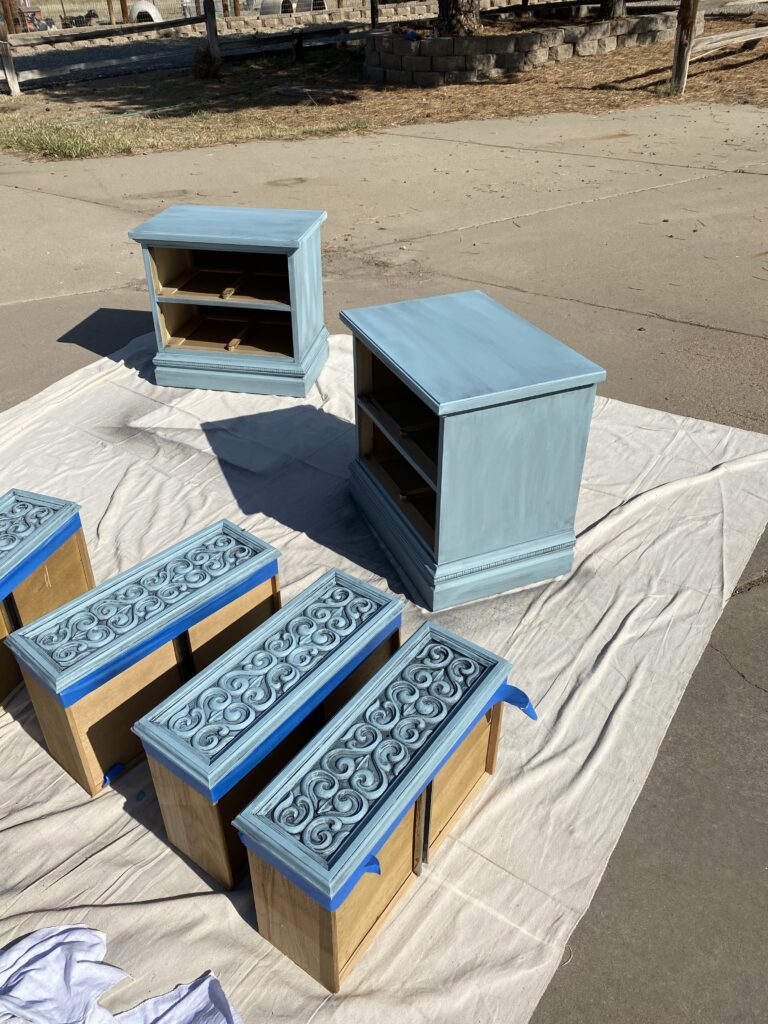
The glaze brought out the beautiful detailing. It also added depth, especially in the places where the pieces had gotten a little beat up.
I let the pieces dry for four hours.
Topcoat
I used the Rust-oleum matte clear topcoat spray can. It was so easy. I let the first coat dry for about 30 minutes and then did a second. Next, I let all pieces dry for a full 24 hours before putting the drawers back in and adding the new hardware.
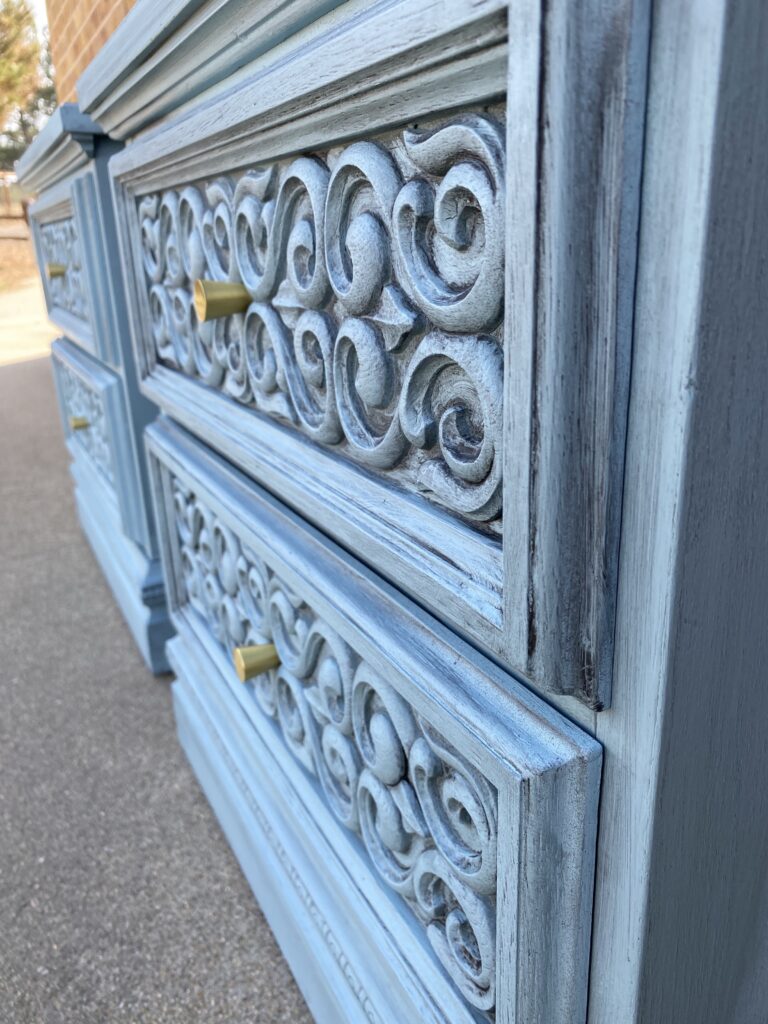
Finish
Pics or it didn’t happen.
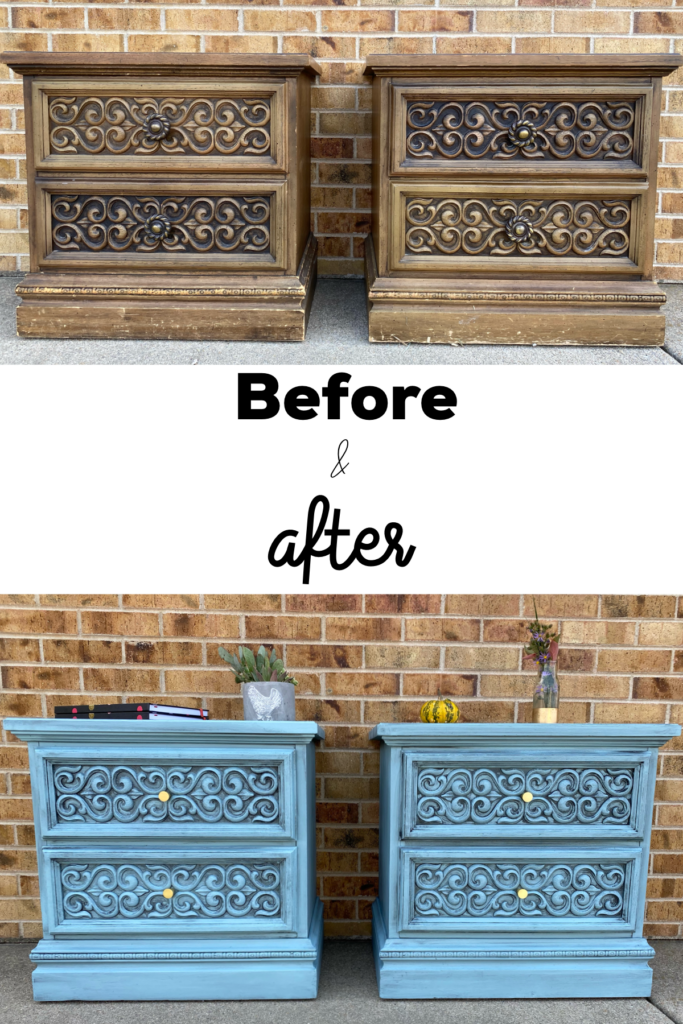
Oh, also
If you enjoyed this, check out the vanity I whitewashed. Also, you know how the blogging world is, doing this stuff is way more fun when you get to share it with others. Please share and pin these. I will be forever grateful.
Here’s a web story I made about these fun pieces!
[…] So, it’s now been over a year with this treatment on the cabinets. I still LOVE it. It looks just like it did the day I did it. In fact, I love it so much that I had a granite guy come out and replace what was a tile counter for a legit granite one and even added a snazzy vessel sink. Now our guest bath looks AWESOME. Also, if you enjoyed this post I just did some bedside tables/nightstands (I don’t know what the difference is between these … […]